
Halloween baking brings excitement, laughs, and messy fun into the kitchen. Kids love helping roll dough, decorate silly faces, sprinkle candy, and eat frosting faster than it dries. Whether you’re planning a classroom treat box, a family baking night, or a spooky party table, this list helps you whip up cookies that spark squeals and sticky fingers. Many ideas use basic cookie dough and pantry staples, so any skill level can jump in. Get your mixing bowls ready and enjoy a kitchen full of giggles and sugar-coated memories.
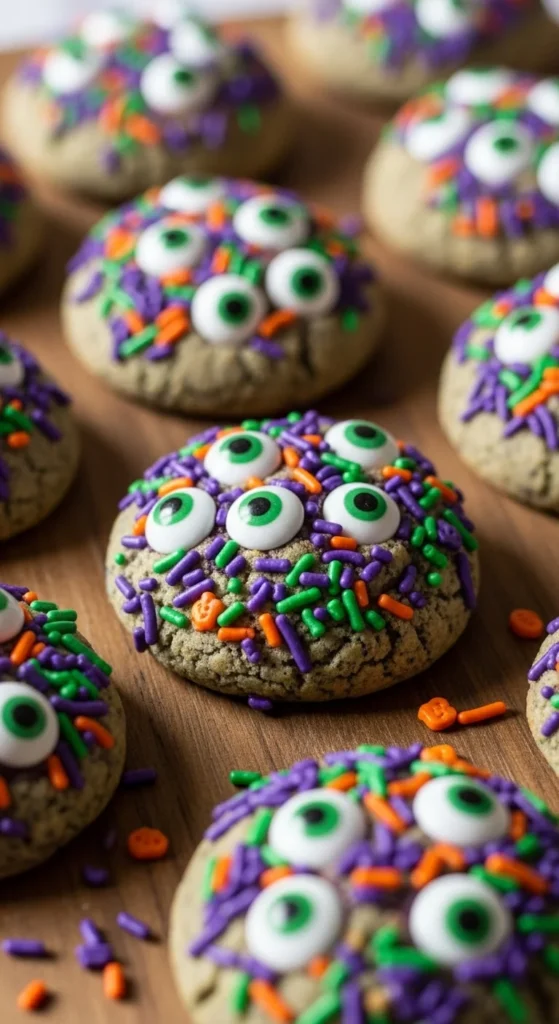
Gooey Monster Eyeball Cookies
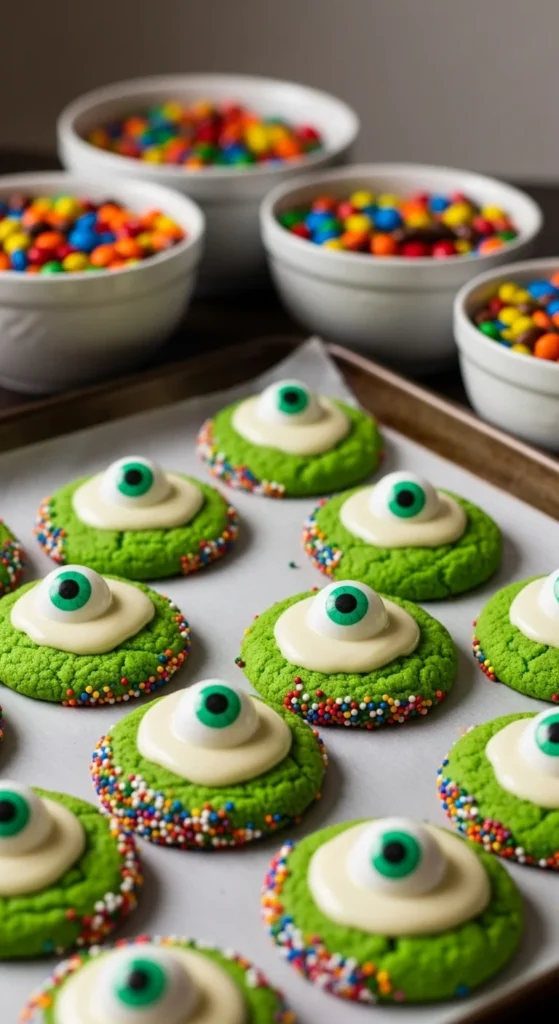
These fun monster cookies grab attention fast. Start with sugar cookie dough tinted neon green. Scoop dough balls and press slightly before baking to get a soft, puffy texture. While still warm, press candy eyeballs into the center and drizzle melted white chocolate to create ooze. Kids can place multiple eyes for silly expressions. Add purple or orange sprinkles around edges for extra color. If you prefer chewy cookies, chill dough before baking. Store in airtight containers so they stay soft. You can also use boxed cookie mix to keep the process simple. Let kids choose their monster colors for extra personality.
Mummy Sugar Cookies
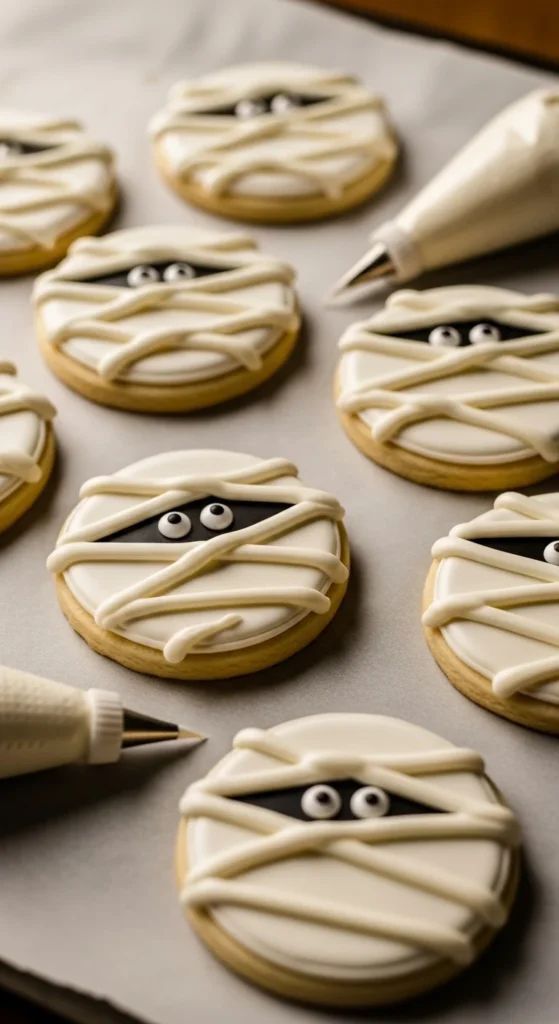
Mummy cookies are playful and easy. Bake round sugar cookies—store-bought dough works fine. Once cooled, pipe thin zigzag icing lines across the surface like wrappings. Leave small space for eyes, then add candy eyeballs. Use a simple powdered sugar icing to keep prep short. Kids love adding lots of strips to give each mummy a different personality. You can tint icing gray for an aged look or keep it white for a clean classic style. Serve on black plates for a spooky effect. Great make-ahead snack for school parties or trick-or-treat night.
Chocolate Spiderweb Cookies
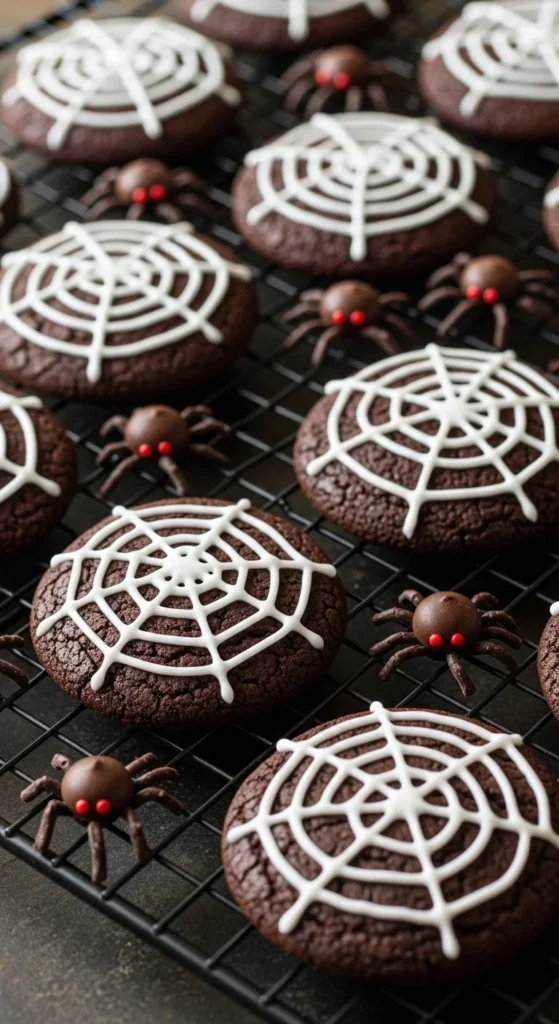
Spiderweb cookies add creepy style without tricky steps. Bake chocolate cookies until soft. Pipe a white icing spiral from the center outward, then drag a toothpick through lines to form a web. Kids enjoy dragging the toothpick and watching patterns appear. Add chocolate sprinkle “spiders” or tiny candy eyes if you want characters on top. Use pre-made icing tubes to save time. These cookies look dramatic on black platters with plastic spiders scattered around. Perfect for Halloween night dessert tables.
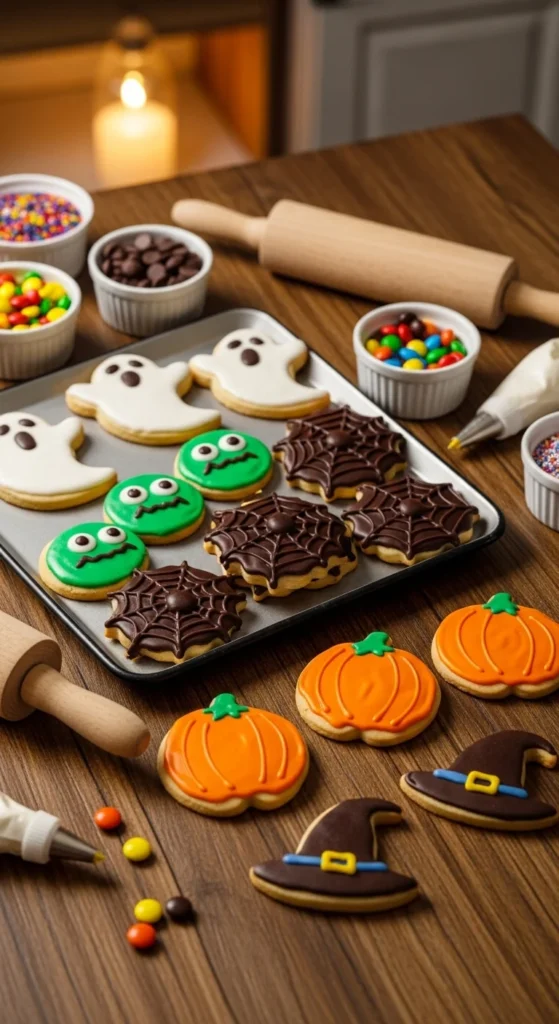
Pumpkin Patch Thumbprints
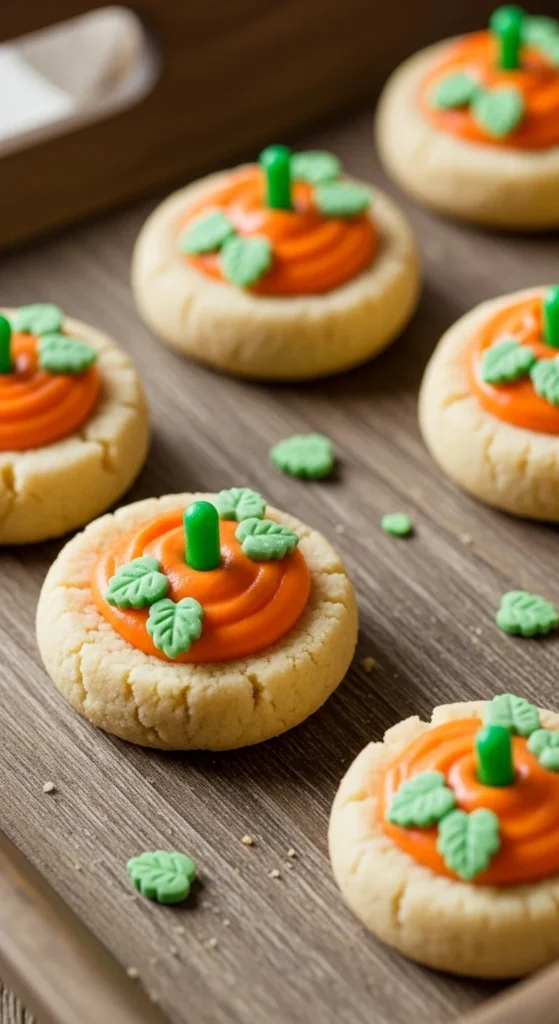
Start with soft thumbprint cookies. Dye icing orange and fill the center. Use tiny chocolate chips or candy pieces to create stems. Add leaf sprinkles if you have them. These little pumpkins feel cute and seasonal rather than scary, making them perfect for younger kids. Chill cookies before adding icing to avoid melting. Keep stems small so the pumpkin shape stands out. Make a few in white icing to mimic mini ghost pumpkins. Display in a shallow bowl lined with parchment for a farmer’s-market feel.
Witch Hat Cookie Cones

Witch hats bring Halloween magic. Bake simple chocolate cookies or use store-bought. Dip mini waffle cones in melted chocolate and place upside down on cookies. Pipe a purple or green band around the base and add tiny candy stars. This mix of textures makes them extra fun to eat. Kids enjoy dipping cones and choosing colors for the bands. Set hats upright until chocolate sets. These cookies stand tall, adding height to a party display.
Ghost Meringue Cookies
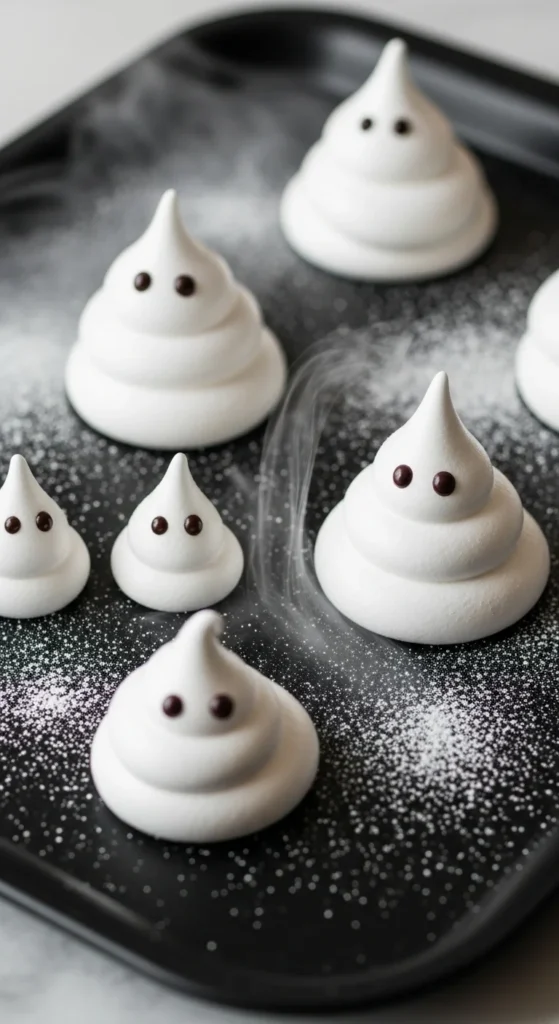
For a light, airy treat, whip meringue into ghost shapes and bake low until crisp. Use melted chocolate or edible marker for eyes. These cookies melt like cotton candy and look adorable. Pipe tall swirls for floating spirits. Keep oven temp low so color stays pure white. Since meringue uses pantry basics, it’s a smart option on busy weeks. Pair with hot cocoa for a cozy spooky evening.
Frankenstein Mint Cookies
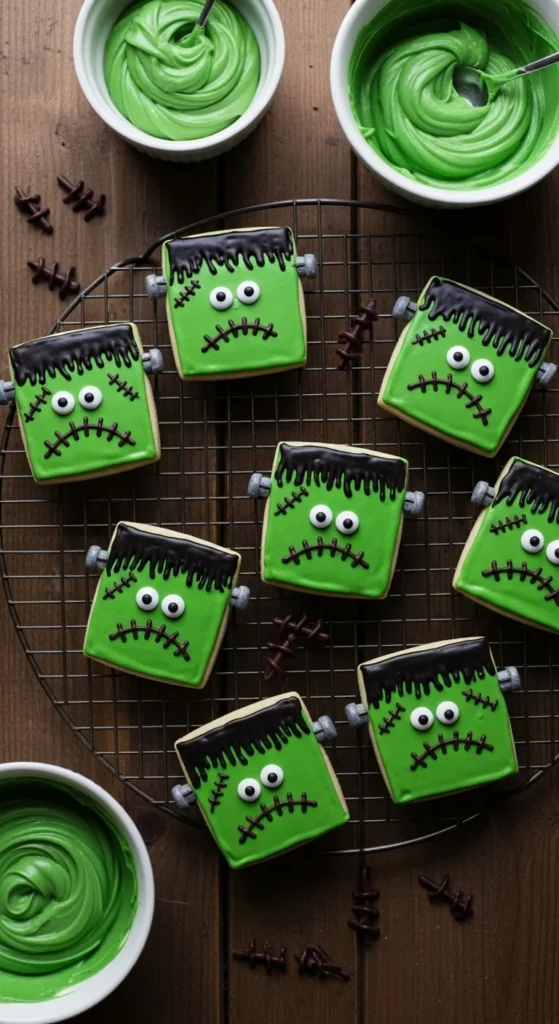
Frost square sugar cookies with green icing. Add black sprinkles or piped chocolate for hair. Place candy eyes and draw stitches with melted chocolate. Kids have fun making silly face expressions. For a mint treat, add mint extract to frosting. Use edible marker if piping feels tough. Keep shapes simple—box shapes work well. Serve chilled for firmer frosting.
Creepy Crawly Dirt Cookies
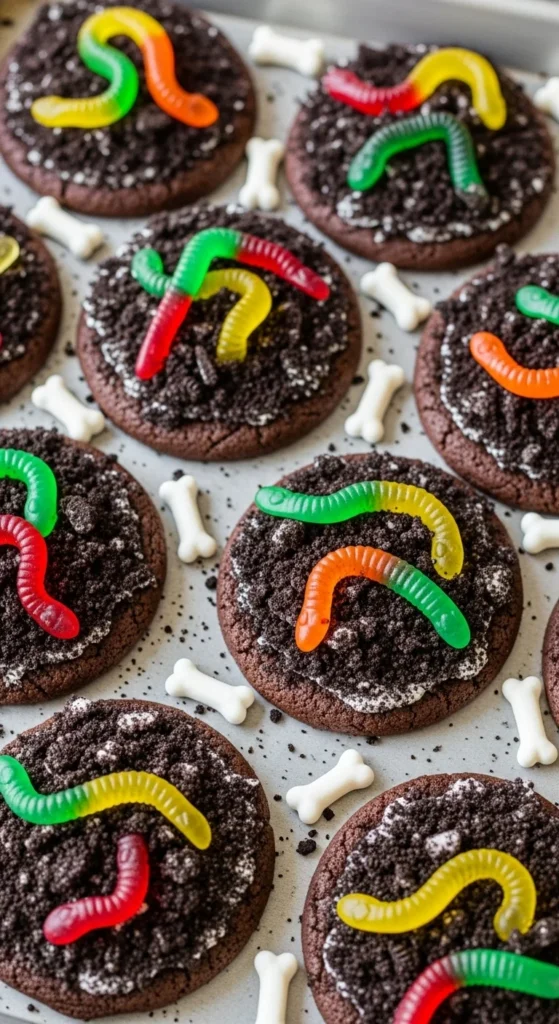
These treat cookies look like tiny spooky gardens. Bake chocolate cookies and frost lightly. Press crushed cookies on top for dirt. Add gummy worms or candy bones. This treat feels messy and fun—perfect kid vibe. Refrigerate before serving if you want the dirt layer firm. Great party platter filler.
Vampire Bite Red Velvet Cookies
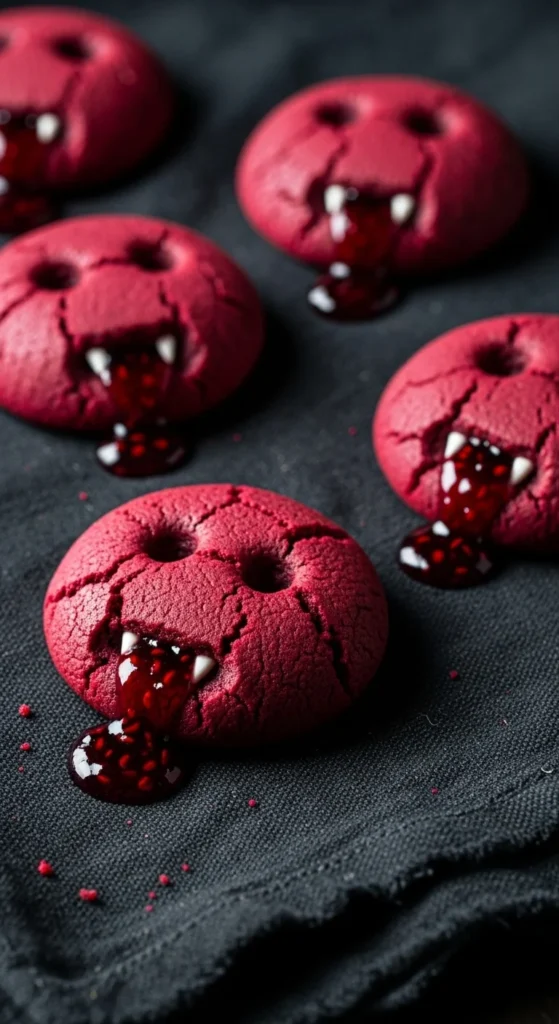
Bake red velvet cookies until soft. Make two small holes with a straw and fill lightly with raspberry jam so it oozes. The effect is playful, not scary. Add a tiny white chocolate chip on each side for fangs if desired. Keep jam amount light to avoid soggy texture. Kids find the “bite marks” hilarious.
Black Cat Chocolate Cookies
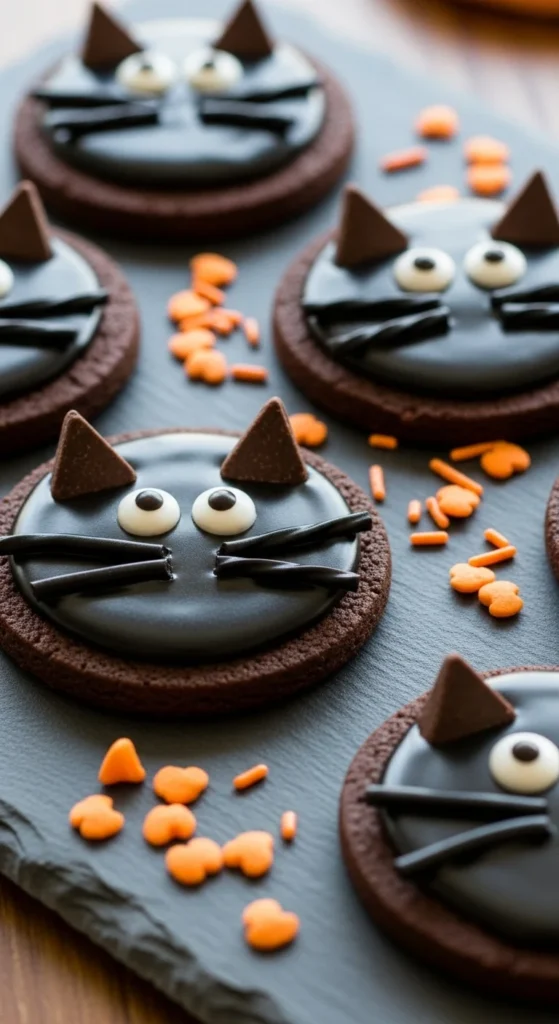
Bake round chocolate cookies and frost in deep black icing. Add candy eyes, tiny chocolate chips for ears, and thin licorice strings for whiskers. Kids love helping place faces. Make tails using a swirl of icing or a small candy twist. If black icing feels bold, use dark cocoa frosting for a softer effect. Keep decorations simple so little hands can join. Serve these with orange napkins for classic Halloween colors. Store leftovers in airtight containers to keep whiskers crisp. Try adding a hint of cinnamon to cookie dough for warm flavor. Use mini cookie size for party platters so kids can grab one easily without crumbs everywhere.
Pumpkin Spice Chocolate Chip Cookies

Pumpkin spice brings fall comfort into your kitchen fast. Mix pumpkin purée into cookie dough along with cinnamon and nutmeg. Fold in chocolate chips for sweetness. Scoop dough balls and bake until soft edges form. These cookies stay chewy and moist, so let them cool fully before stacking. Kids enjoy sprinkling mini pumpkin candies on top. Pair these cookies with warm cider for a cozy October evening. Wrap a small bundle with ribbon for teachers or neighbors. Store in fridge if you like denser texture and easier handling when decorating.
Candy Corn Sugar Cookies
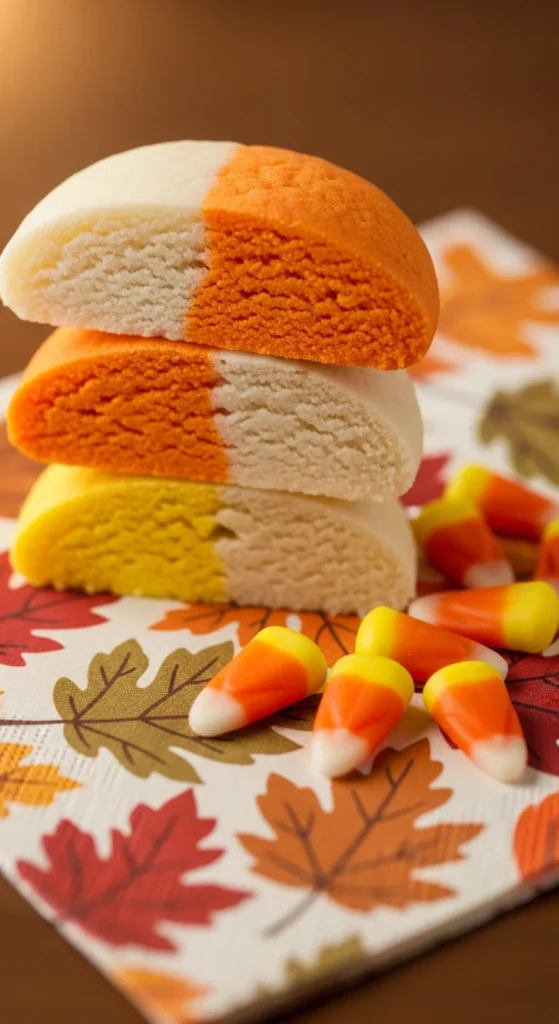
Shape sugar cookie dough into layered logs: yellow, orange, then white. Chill, slice into wedges, and bake. These mimic candy corn colors without being actual candy corn, so even kids who dislike it still enjoy the look. Keep portions small since these are fun little bites. Add small drizzle of white icing for shine. Display on black trays for color contrast. Dough can freeze well, so prep ahead for parties. This project works with boxed mix too if you want fast results.
Witch Finger Almond Cookies
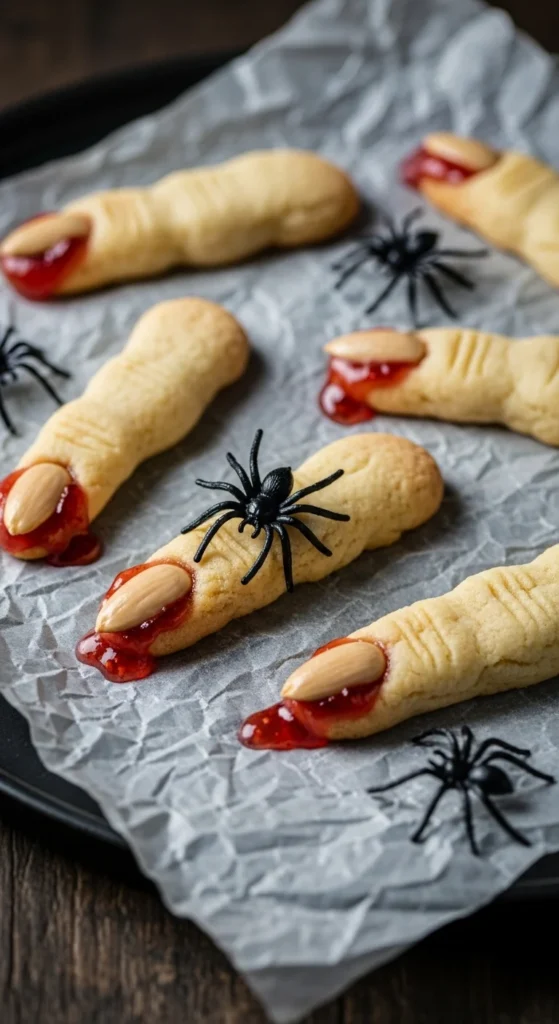
Roll softened sugar dough into long finger shapes and press almond slices as nails. Add tiny knife marks for knuckle lines. Brush a dab of red jam near the base to make them playful, not gory. Kids love the silly look. Chill shaped dough before baking to hold form. Dip almonds in melted chocolate for dark nails if you like dramatic touches. Serve piled in a bowl labeled “witch treats.” These cookies spark laughter every time.
Graveyard Oreo Cookies
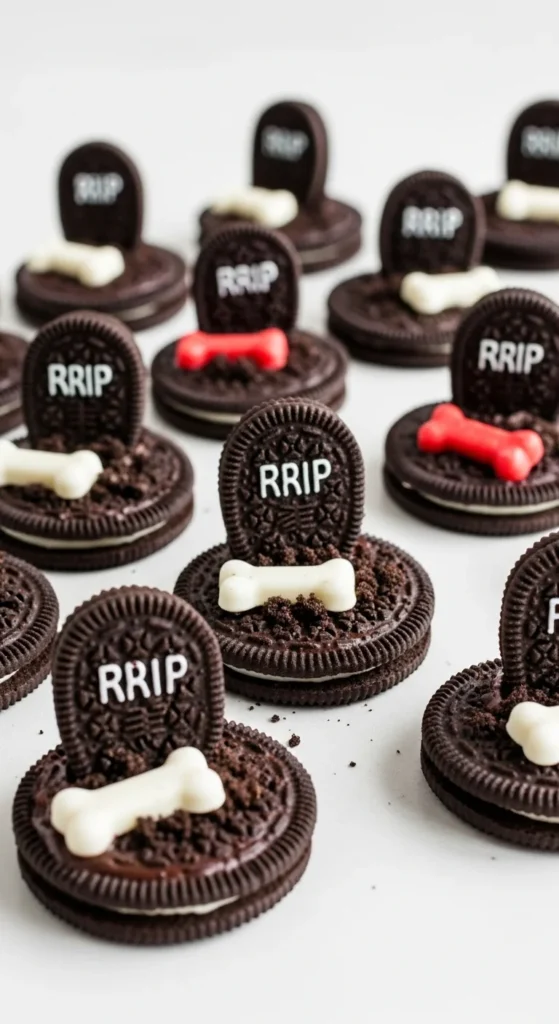
Spread chocolate icing on top of Oreos and dip into crushed cookie crumbs. Press a small cookie upright as a tombstone. Add candy bones or gummy worms. These require no baking, making them perfect for last-minute snacks. Kids can build their own designs quickly. Chill trays for a firmer topping. Arrange on dark platters for a yard effect. Simple, cute, and fun.
Ghost Marshmallow Cookies

Place marshmallows on warm cookie tops and toast slightly with a kitchen torch or broiler. Use melted chocolate to dot eyes and mouths. These look like mini floating spirits. Kids enjoy piping faces—some spooky, some silly. Serve warm while marshmallows are soft. Make a few extras because these disappear quickly at parties.
Monster Mash Sprinkle Cookies
Roll cookie dough balls in colorful sprinkles before baking. Insert candy eyes while warm. These cookies shine at school parties because they look wild and festive. Use different sizes of eyes for quirky faces. Chill dough if you want them thick and chewy. Store in tins lined with parchment to keep sprinkles crisp.
Spider Peanut Butter Blossoms
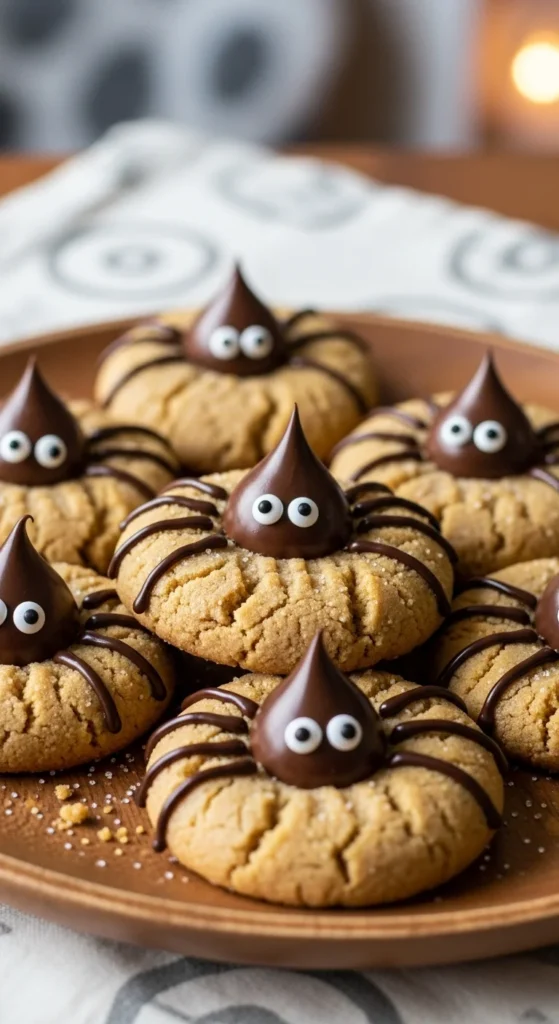
Bake peanut butter blossoms and press chocolate drops in the middle. Add candy eyes to each drop. Pipe legs using melted chocolate or icing. Kids enjoy giving spiders goofy expressions. Serve with milk or cocoa for a movie night snack. Make a nut-free version with sunflower butter if needed for class parties.
Marshmallow Skeleton Cookies

Bake chocolate cookies and pipe skeleton bodies using thin white icing. Press a mini marshmallow at the top for the head, drawing eyes with edible marker. Simple lines make this approachable for young decorators. Chill cookies briefly to set icing. Arrange them on Halloween napkins for a playful bone-crew vibe.
Pumpkin Chocolate Chip Whoopie Cookies
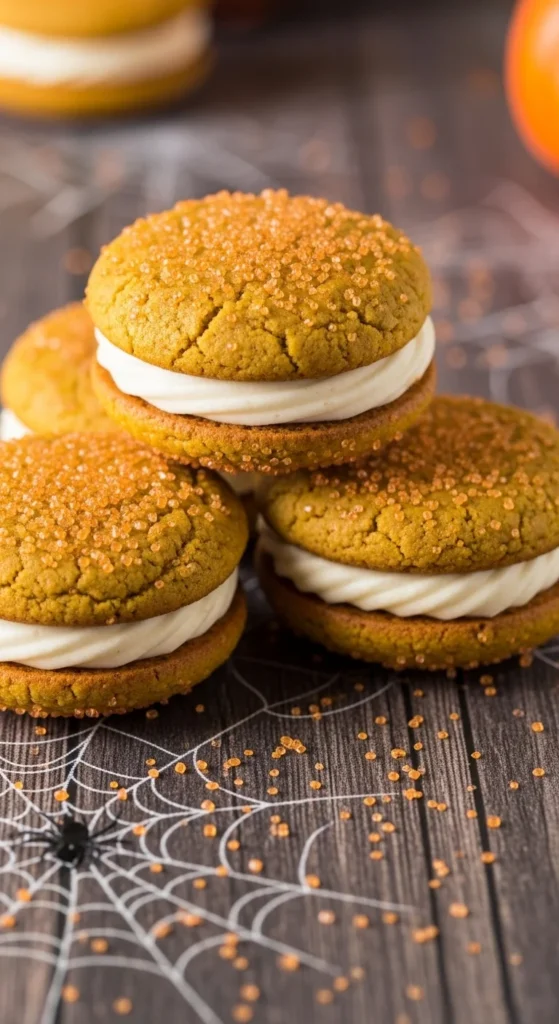
Make small pumpkin cookies and sandwich frosting between two pieces. Fold chocolate chips into dough for extra sweetness. Kids love squeezing filling inside. Chill assembled sandwiches for neat edges. Decorate tops with tiny sprinkles or edible glitter. These look fancy but are friendly for beginners.
Witches’ Broomstick Cookie Sticks
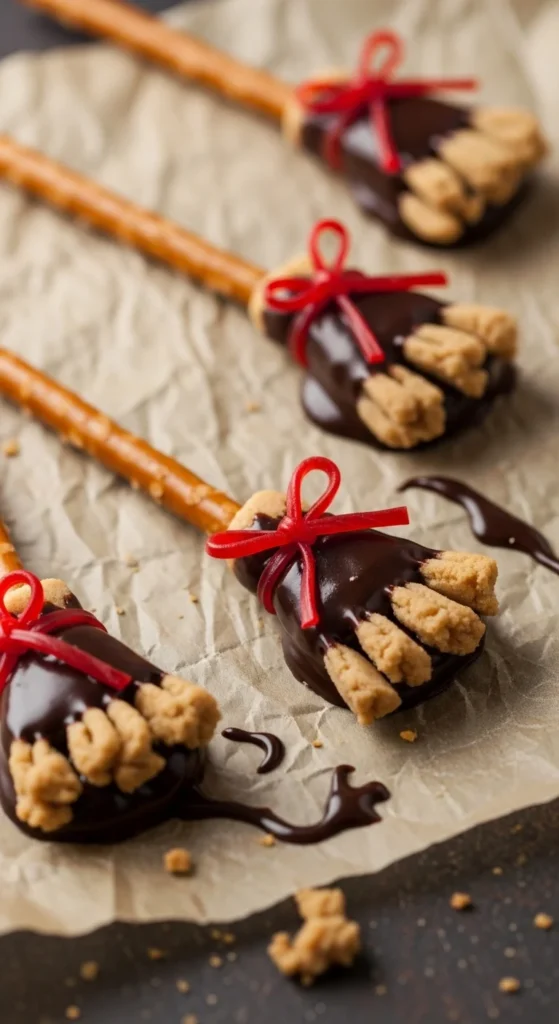
Bake thin shortbread cookie “bristles” and attach to pretzel sticks dipped in chocolate. Tie candy strings around the join. These broom cookies feel whimsical and kid-approved. Work in small batches so chocolate doesn’t harden before you add pieces. Pair with hot apple cider for a cozy snack tray.
Zombie Ooze Thumbprints
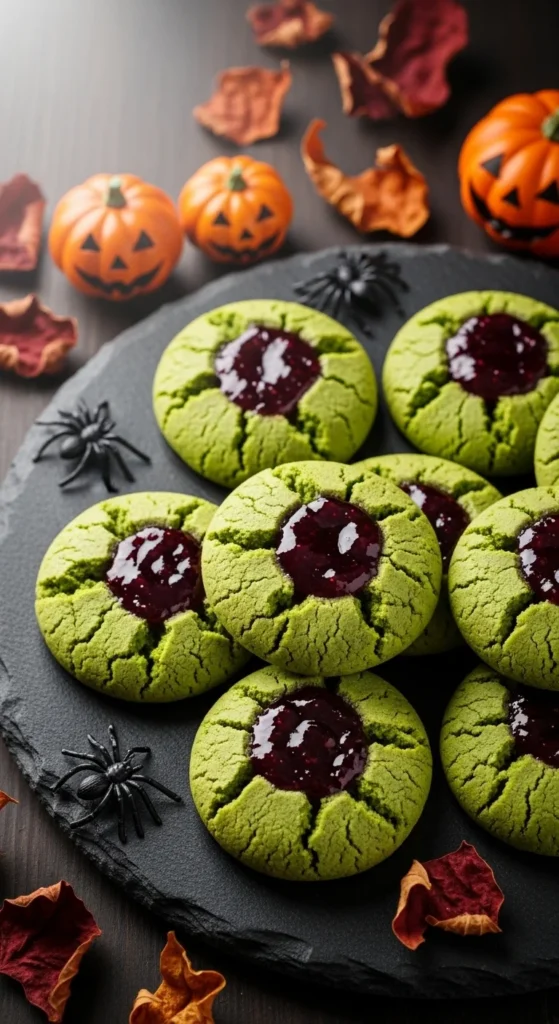
Tint cookie dough green and let cracks form during baking. Fill centers with purple jam for “ooze.” Add tiny sugar skull sprinkles if you find them. Kids love the gooey look. Keep jam layer thin so cookies hold shape. Display in bowls lined with black tissue.
Cauldron Cookie Cups
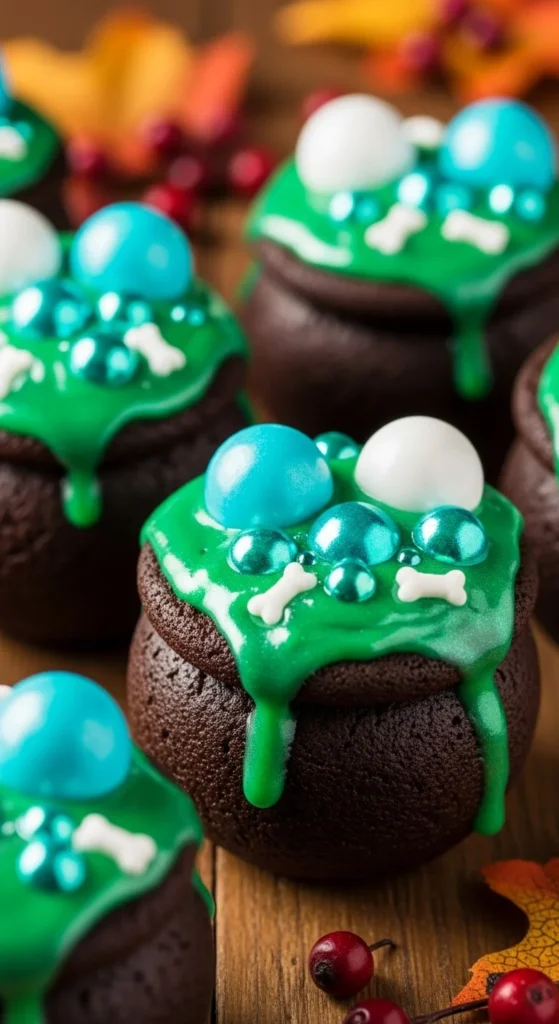
Press cookie dough into mini muffin tins to create cups. Fill with green frosting or pudding. Add candy pearls or bone sprinkles. These resemble tiny bubbling cauldrons. Kids enjoy scooping filling with spoons. Refrigerate for firmer filling. Serve on black trays with plastic spiders.
Conclusion
Halloween cookies bring laughter, sticky hands, and sweet tradition into the season. With simple dough, playful colors, and candy eyes galore, you can turn a regular baking day into a memory that kids talk about long after trick-or-treat bags empty. Pick a few designs, invite little helpers, and enjoy filling your kitchen with spooky smiles and warm treats.

Leave a Reply