
Wall paneling is one of the simplest ways to give your space a rich, custom feel without major construction. It instantly adds texture, dimension, and personality — whether you’re going for modern elegance, cozy cottage charm, or a dramatic feature wall. The best part? With the right approach, most homeowners can do it themselves.
Let’s turn a plain wall into a designer-style focal point that feels intentional and elevated.
Pick the Style That Fits Your Space
Start by choosing the type of paneling that works with your home style and room size.
Popular choices:
- Board and batten — classic, structured, works almost anywhere
- Shiplap — farmhouse or coastal feel
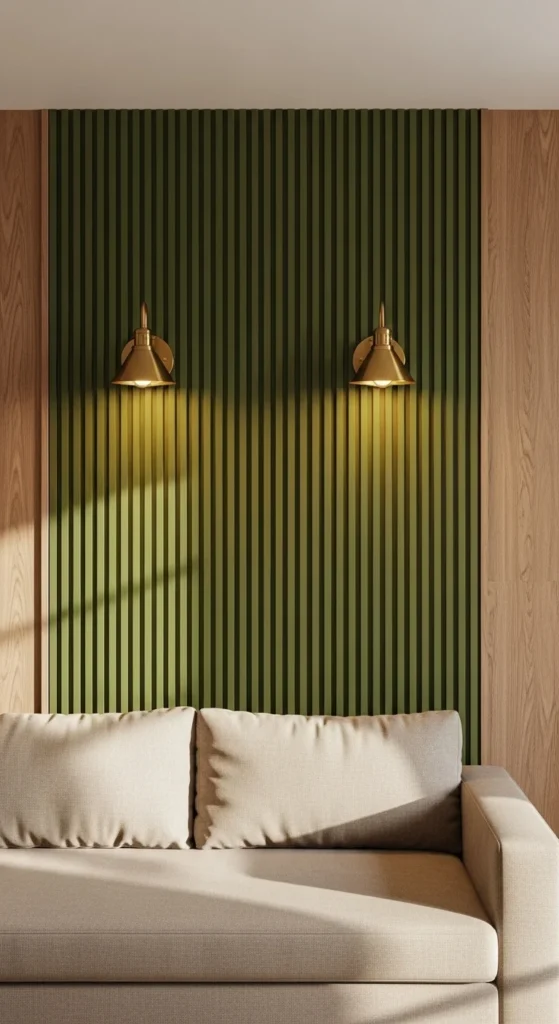
- Vertical slats — modern, sleek, adds height to a room
- Geometric trim design — creative, chic accent wall
- Beadboard — timeless cottage charm
Tip: Vertical designs make rooms feel taller. Horizontal lines widen small spaces.
Once you decide your style, sketch your layout — even a rough drawing gives clarity and direction.
Gather Materials & Prep Your Wall
You don’t need complicated tools. Most paneling can be done with:
- MDF boards or wood trim
- Saw (hand saw or miter saw)
- Level and measuring tape
- Nail gun or brad nails
- Wood filler + sandpaper
- Primer and paint
Remove outlet covers and lightly sand walls so boards stick cleanly. Wipe dust and make sure the surface is dry.
If you live in a humid climate, prime boards before installation to prevent warping.
Pro tip: Pre-cut and label your pieces to make installation easier.
Measure Twice, Cut Once
Accurate measuring makes the difference between polished and sloppy.
- Measure wall height and width
- Mark your pattern using painter’s tape before cutting
- Make sure spacing between slats or battens is consistent
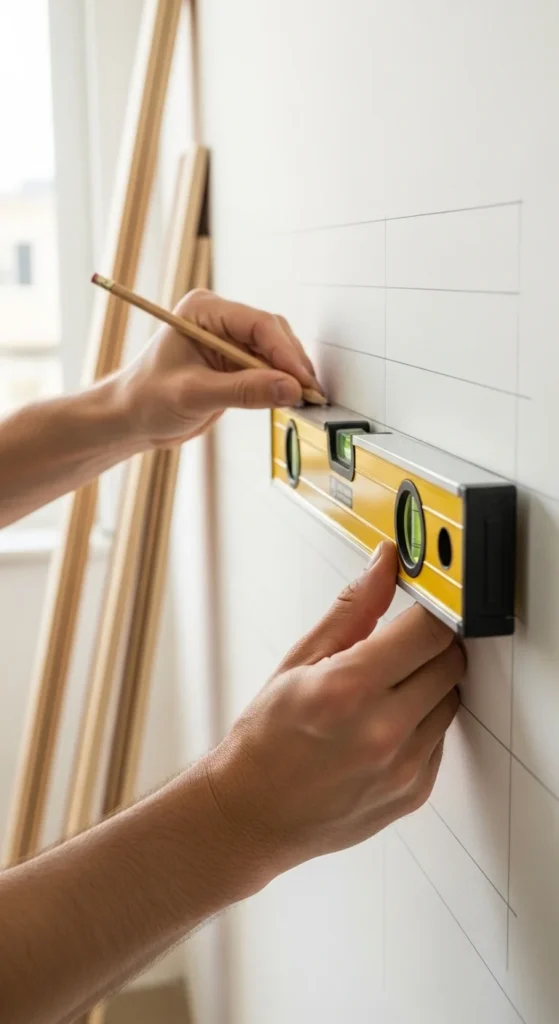
Even spacing turns a DIY wall into a high-end feature. Take your time here — it’s worth it.
Install With Care
Now the fun part — attaching the boards.
Steps:
- Start with your biggest or base panel pieces
- Use a level before nailing each section
- Nail gun makes the job smoother, but small nails + hammer also work
- Check spacing and hold boards in place before securing
Add top rails or frames first for board-and-batten designs.
For slat walls, start at one end and move across slowly.
If wall corners are crooked (common in older homes), cut boards for the wall shape instead of forcing straight lines.
Fill, Sand & Caulk for a Seamless Look
This finishing stage gives you that “built-in” look.
- Fill nail holes with wood filler
- Sand smooth once dry
- Caulk edges where boards meet the wall
- Wipe excess caulk with a damp cloth
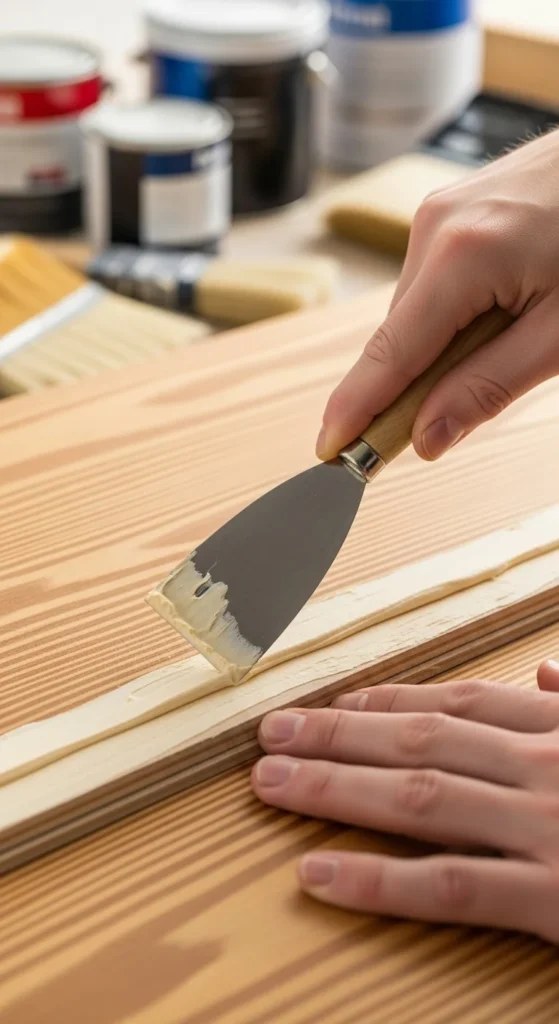
Patience here = professional results.
Paint & Style Your New Feature Wall
Time to bring your vision alive.
Tips for choosing paint:
- Deep colors = drama (navy, charcoal, emerald)
- Soft neutrals = calming, cozy (taupe, warm greige, creamy white)
- High-contrast trims add luxury
Use semi-matte or satin finish to highlight texture without too much shine.
Let it dry fully before styling your space.
Add cozy elements:
- Warm lighting
- Textured pillows & throws
- Wall art or mirrors that complement the pattern
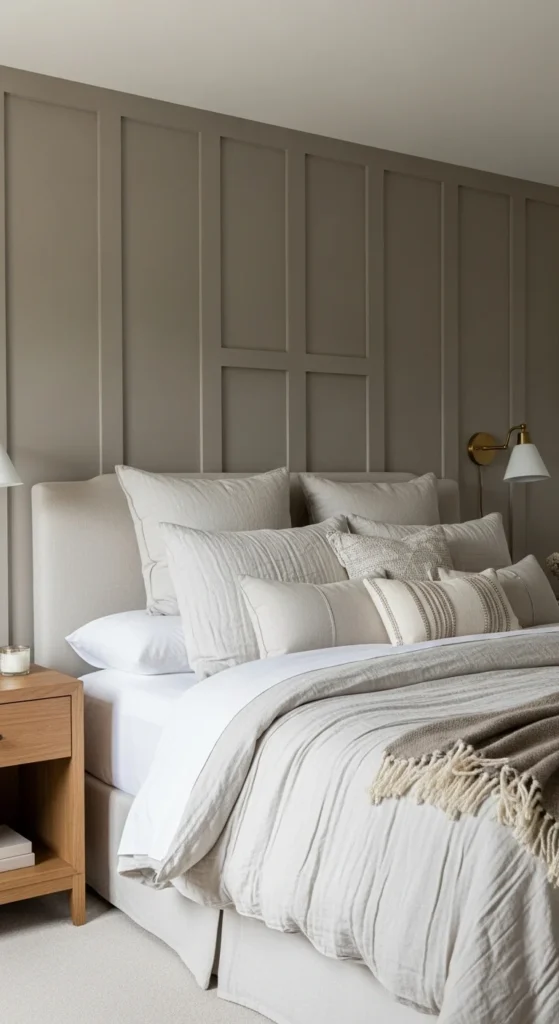
Your new wall becomes a backdrop that instantly upgrades the room.
Final Thoughts
Installing wall paneling is a rewarding project that creates instant impact. With simple tools, careful measuring, and stylish finishing touches, you can turn any blank wall into a statement feature. Start small — maybe a hallway section or a bedroom wall — and build confidence as you go.
Save this guide for when you’re ready to transform your space — one beautiful panel at a time ✨
Leave a Reply